Pricing Categories in WP Travel allow you to create different pricing options for different types of travelers, such as Adult, Child, Infant, Senior, or any custom traveler category. Instead of assigning a single price to everyone, you can offer separate prices based on the traveler type, making your booking process more flexible and user-friendly.
Once a pricing category is created, it can be reused across multiple trips, saving time and ensuring consistent pricing throughout your website.
Step 1: Create a Pricing Category
Before assigning prices to your trips, you first need to create one or more pricing categories.
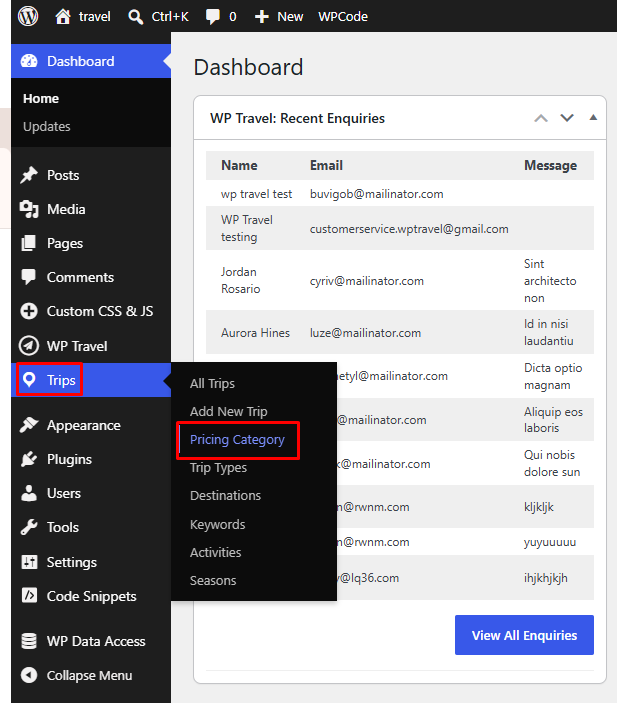
Go to: WordPress Dashboard → Trips → Pricing Category
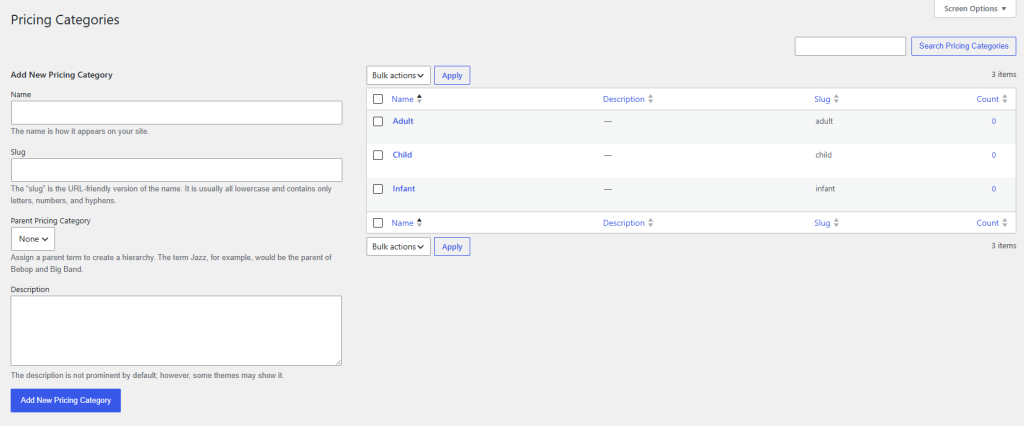
The Pricing Category page allows you to create new traveler categories and manage existing ones. Click Add New Pricing Category to create a new category, while the table on the right displays all pricing categories you’ve already created.
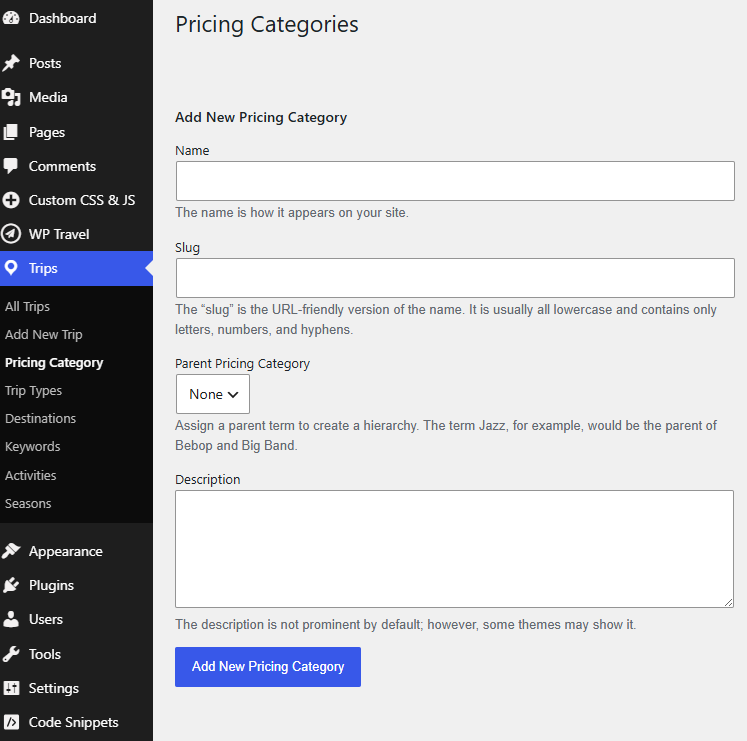
Complete the following fields:
- Name – Enter the traveler category name (for example, Adult, Child, Infant, or Senior).
- Slug (Optional) – A URL-friendly version of the category name. WordPress automatically generates one if left blank.
- Description (Optional) – Add a short description for internal reference.
After entering the details, click Add New Pricing Category.
The newly created category will appear in the list of pricing categories and will be available for use across all trips on your website.
Step 2: Assign a Pricing Category to a Trip
After creating your pricing categories, the next step is assigning them to a trip.
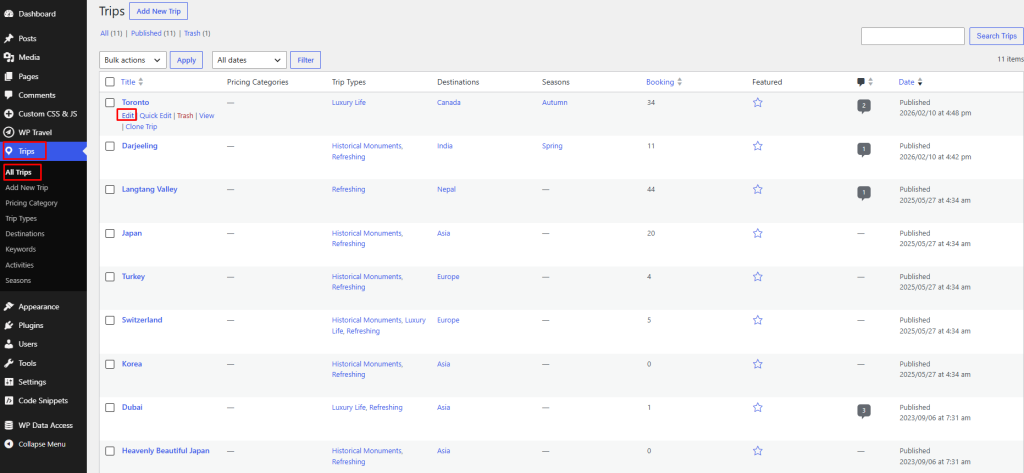
Navigate to: Trips → All Trips
Open the trip you want to edit.
Inside the trip editor:
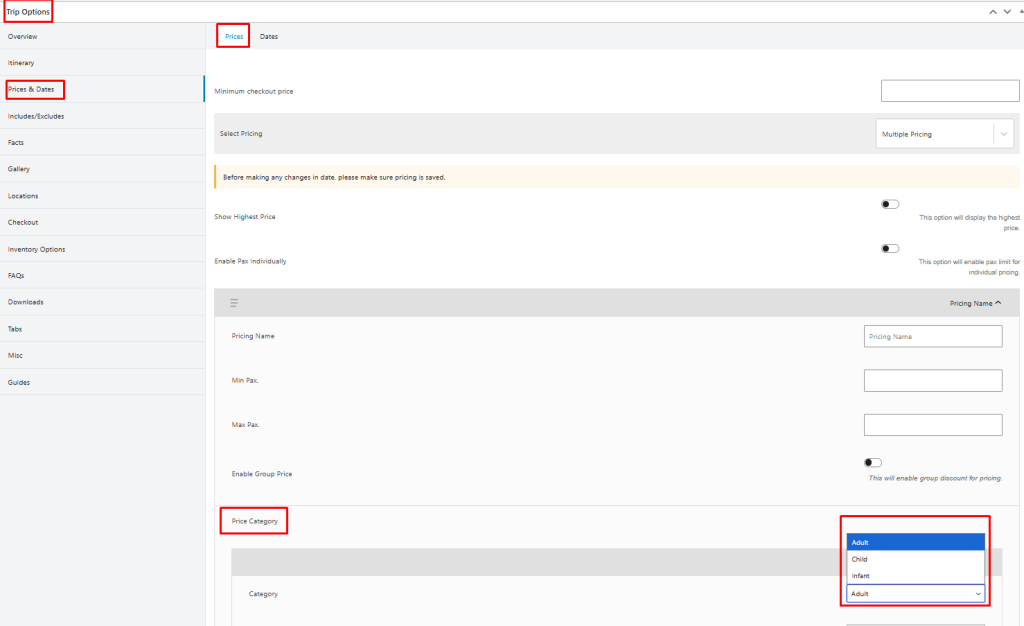
- Scroll down to the Prices & Dates section.
- Add a new pricing option or edit an existing one.
- Continue scrolling until you reach the Price Category settings.
Select the Pricing Category
Under the Category dropdown, choose the traveler category you want to use.
For example:
- Adult
- Child
- Infant
- Senior
After selecting the category, enter the corresponding price.
Repeat this process for every traveler type you want to offer. This allows a single trip to have multiple pricing options based on different traveler categories.
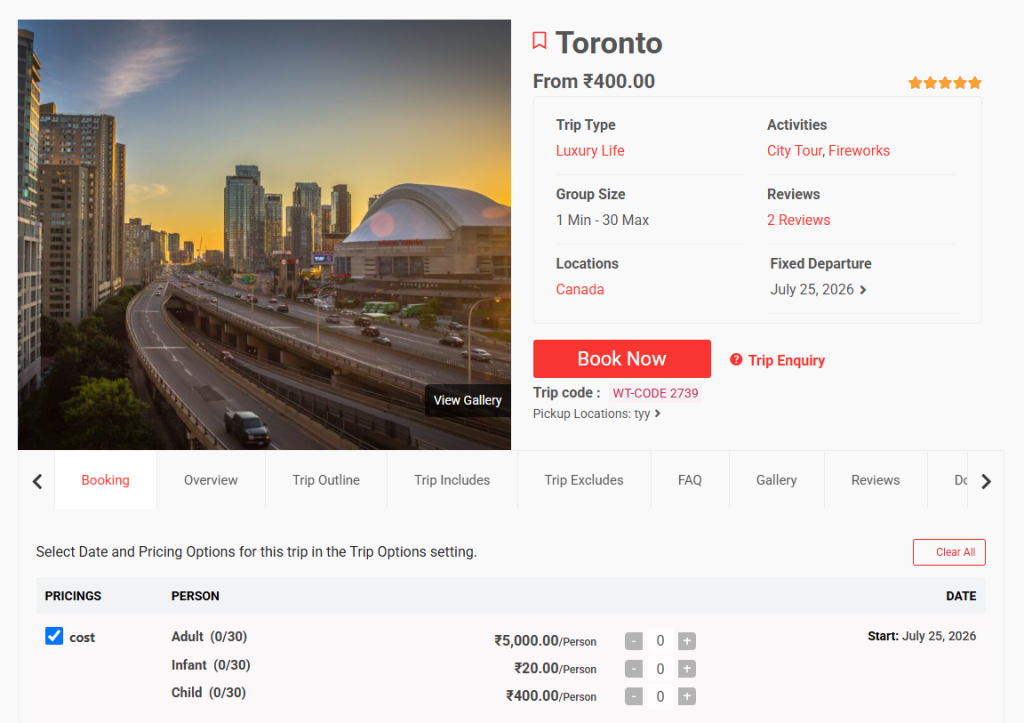
When customers book the trip, they simply select the appropriate traveler category and quantity. WP Travel automatically calculates the total booking cost based on the selected pricing categories.
This provides a smoother booking experience while making pricing management much easier.
Using Multiple Pricing Categories in a Single Price (WP Travel Pro)
By default, each pricing option can be assigned to only one pricing category.
If you want to assign multiple pricing categories within a single pricing option, this feature is available in WP Travel Pro.
For detailed instructions, see:
How to Add Multiple Pricing Categories in a Single Price
?
Learn how to Add Multiple Pricing Categories in a Single Price →
By assigning the appropriate pricing category to each price option, you can offer a more organized booking experience and ensure customers are charged the correct amount based on their selected traveler type. If you need even greater flexibility, WP Travel Pro allows you to assign multiple pricing categories within a single pricing option, making it ideal for more advanced pricing structures.
Check the WP Travel documentation to learn more about configurations, modules, payments, and shortcodes.
Your feedback helps us improve. Feel free to share your thoughts!
Need assistance? Contact our support team, join our Facebook community, and subscribe to our YouTube Channel for video tutorials.
You can also find us on Facebook, Instagram, LinkedIn, TikTok, and X. Thank you for choosing WP Travel.
If you are a WP Travel Free user thinking about upgrading to Pro, simply click on the banner below.


WP Travel Editorial is a team of WordPress and travel industry experts dedicated to delivering technical resources, travel business guides, and general travel insights. With over 10 years of experience, the team provides in-depth release notes, feature updates, and informative articles to help tour operators and travel enthusiasts succeed in the evolving travel landscape.
From plugin updates and industry trends to practical travel resources, WP Travel Editorial shares valuable content that supports both the travel industry and avid travelers.